Today I wanted to update the firmware of my Ender-5 Pro 3d-printer because I want to install a cr-touch sensor to automatically level the bed.
Turns out, this isn’t as easy as I initially thought. To spare you the hours of searching for pieces of information on the internet and getting more frustrated every hour, I decided to write a small guide with the steps I had to do to get it done.
1. Find out the type of Motherboard you have
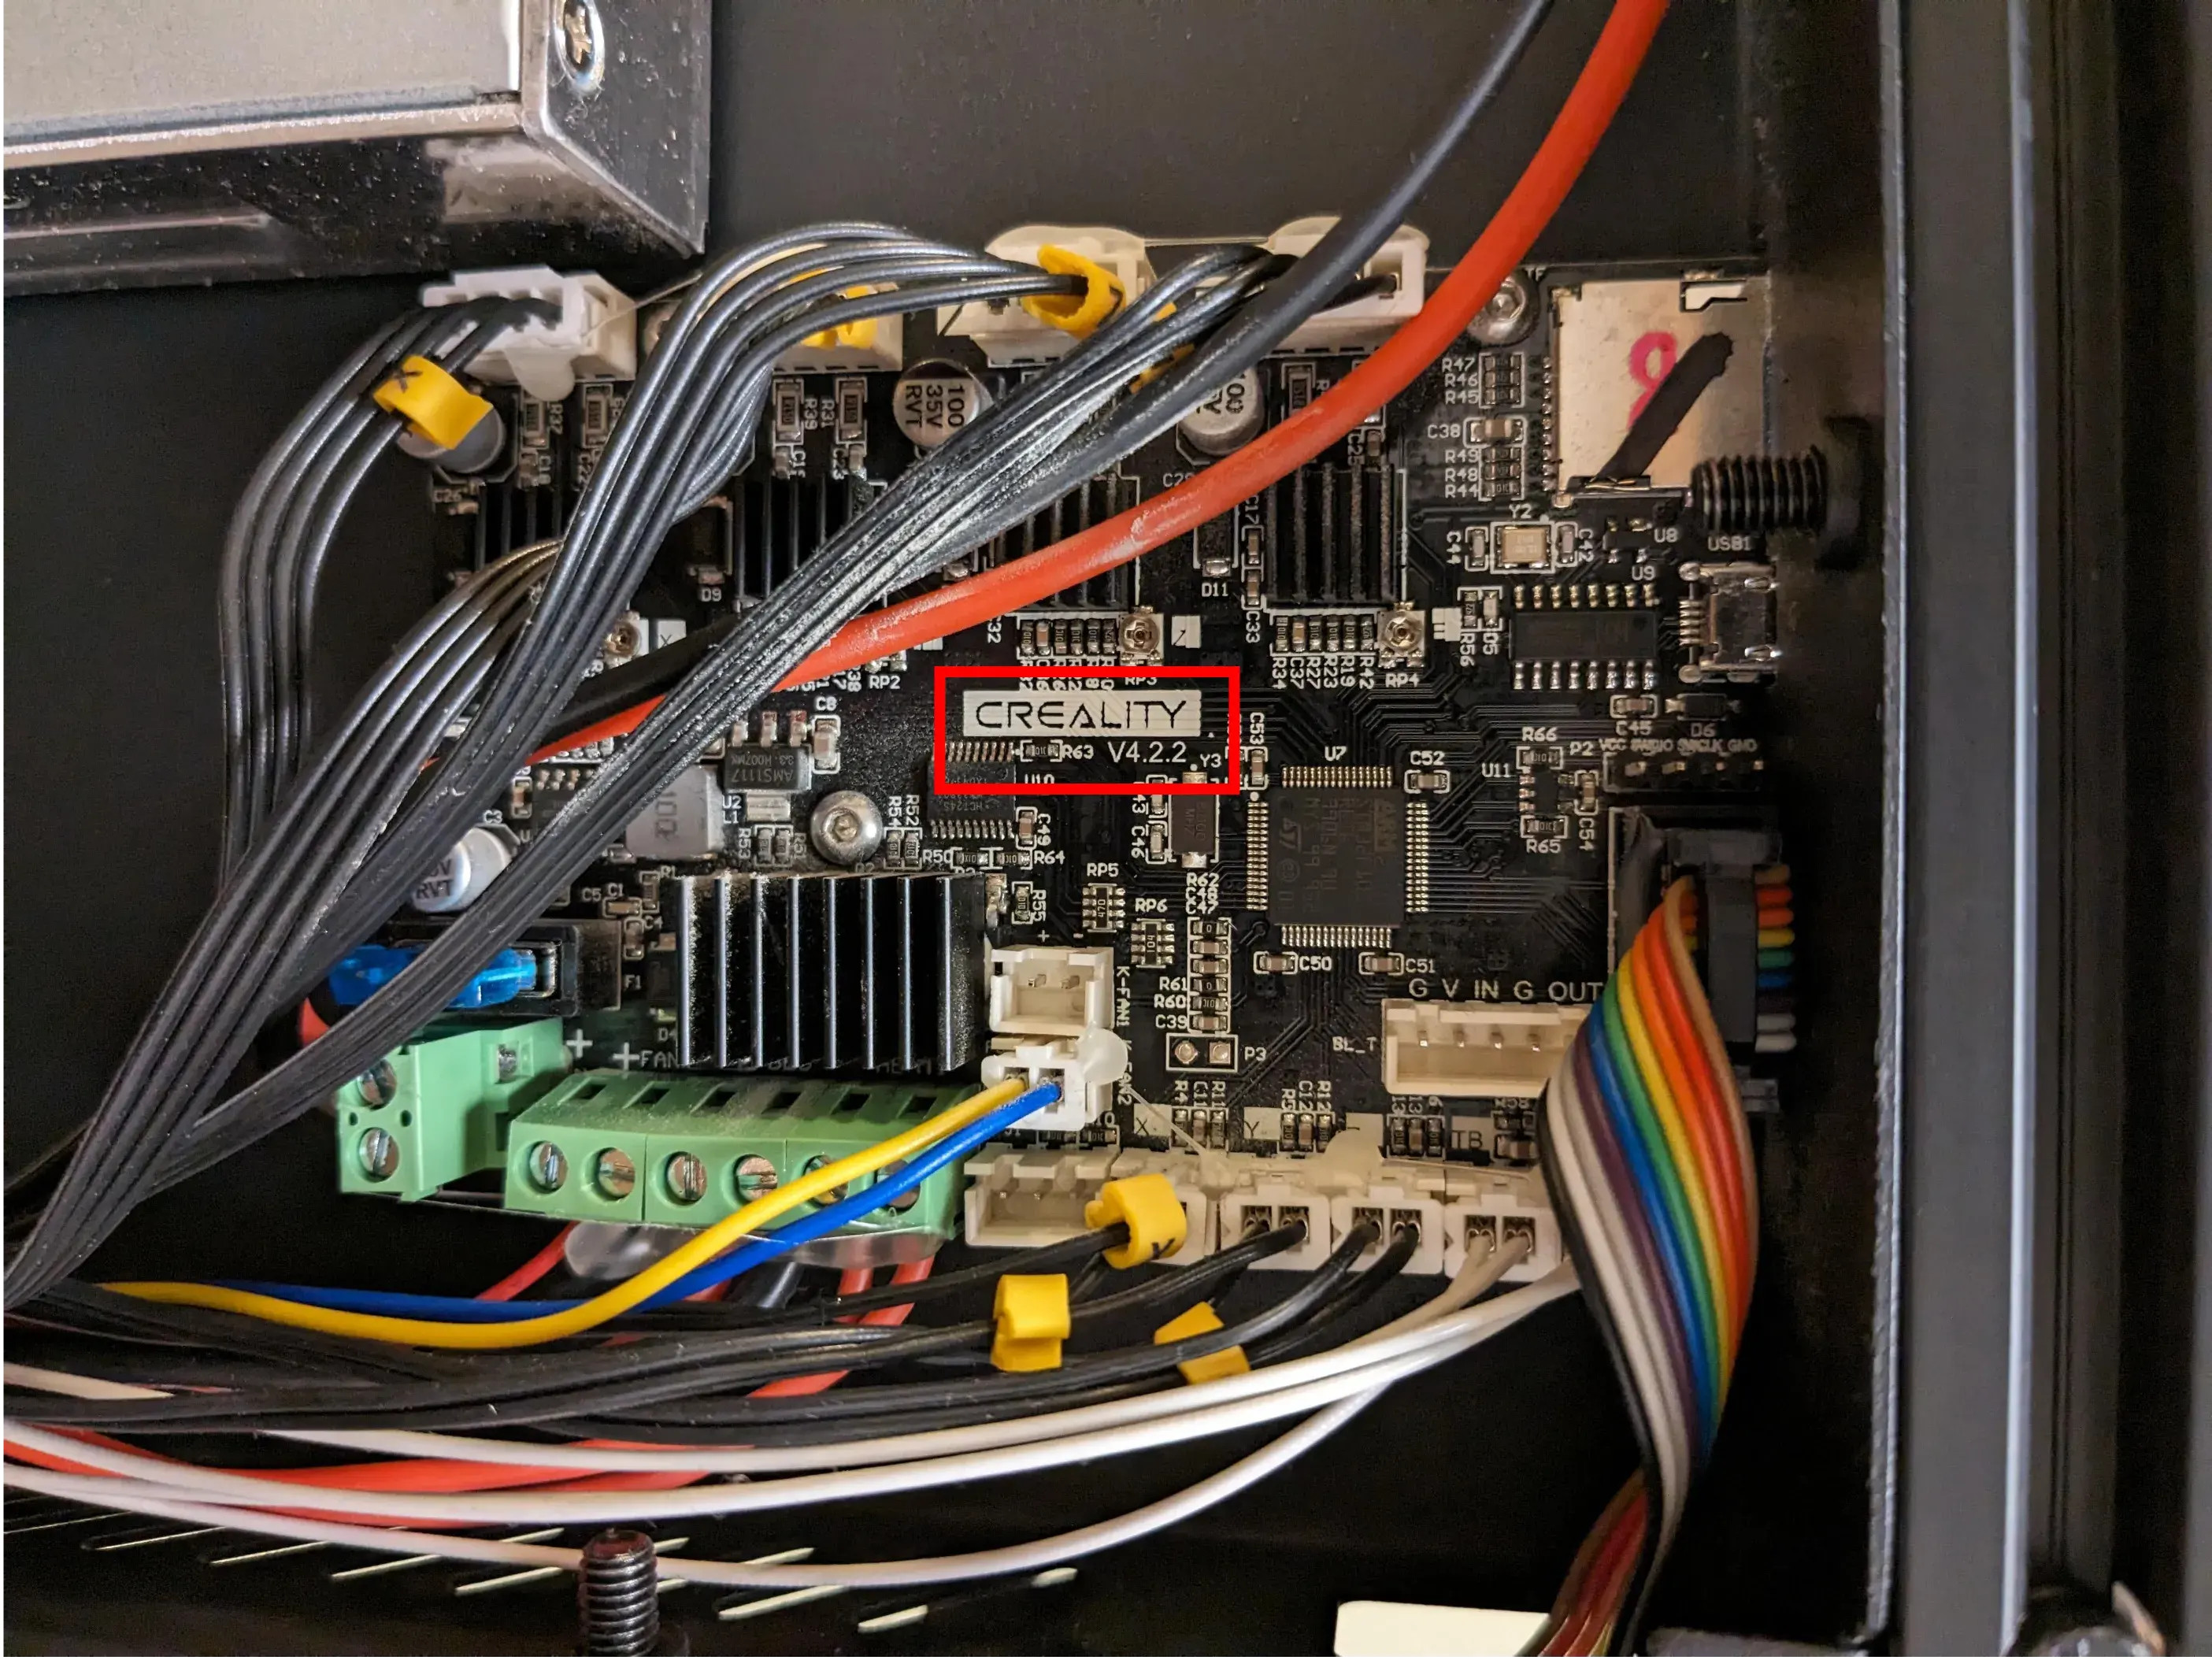
Ender printers come with multiple possible motherboards. The most important difference is that some are 8-bit and some are 32-bit.
You can find out which one you habe by removing the cover at the bottom of the printer. The version of the board is directly below the Creality logo. Watch out for the fan-cable when removing the cover, or else you might break it.
If the number says 4.2.2 or 4.2.7, you have a 32-bit board
These boards only require you to upload the update binary, more on that in a moment. For the older 8-bit boards, some additional steps are necessary up-front, but since I myself have a 32-bit board, I can’t share any information on these. Good Luck!
2. Download the Update from Creality
There are two sources for printer updates, the first being on creality.com and the other one on creality3dofficial.com. The latter one seems to be a reseller of these printers and has a bit older firmware.
I haven’t quite understood, which of the official downloads I should pick, but the one that worked,
was Ender-5 pro 4.2.2mainboard(32bit).
Inside the zip file, I used Marlin2.0.1 BLtouch V1.1.1 Non-adapter board firmware on a best-guess basis.
I think the adapter versions are if you are using a BLTouch bed-level-sensor with an adapter to plug into the
motherboard
3. Prepare the sdcard
On the creality website it says that you just have to format the card and put the update binary on it.
If it was that easy, I wouldn’t be writing this guide.
The steps I needed to get it to work on windows:
- Take a “modern” sd card (in my case a SanDisk with 64gb)
- Open “create and format hard disk partitions”
- Find your sdcard. It is labeled with “Removable”
- Delete all volumes on it with right-click > “Delete Volume”. Now everything on this card should be “Unallocated”
- Create a new volume with 4gb (4096mb) with right-click > “New Simple Volume”. Make sure to use the
filesystem
FAT32and the allocation unit size4096. The Other settings can be left with the default - Take the update bin file, rename it to
firmware.binand copy it to the sdcard after renaming. Make sure no other files or folders are on the card - Eject the sdcard
Don’t ask me why exactly 4gb. I found in some forum post, and it didn’t work with 64gb nor with an antique 128mb card I found.
Note on the filename:
It can be something different then firmware.bin, but it should only contain letters, numbers and a dash (
like firmware-2.bin)
I don’t know if any other chars are allowed, but I’m sure that the spaces in the downloaded filename are not allowed.
Additionally, if you already flashed an update successfully, you cannot reuse the same filename for another update and
have to find another one.
4. Update
This is the easiest part. And here we can see if the previous steps worked.
Make sure the printer is turned off and insert the sdcard.
Before the Ender Logo appears, you should see the blue screen for a few seconds (I think it took like 5 seconds in my case). One second is definitely too short and the printer ignored the file.
To verify, go to the About Printer section in the menu
Conclusion
I hope that this guide helped you at least a little bit. If you have any Questions regarding this, don’t hesitate to ask me on my Mastodon account. I just can’t guarantee that I can help you 😁